

As requested: DIY J.Crew Tissue Flutter Tank tutorial


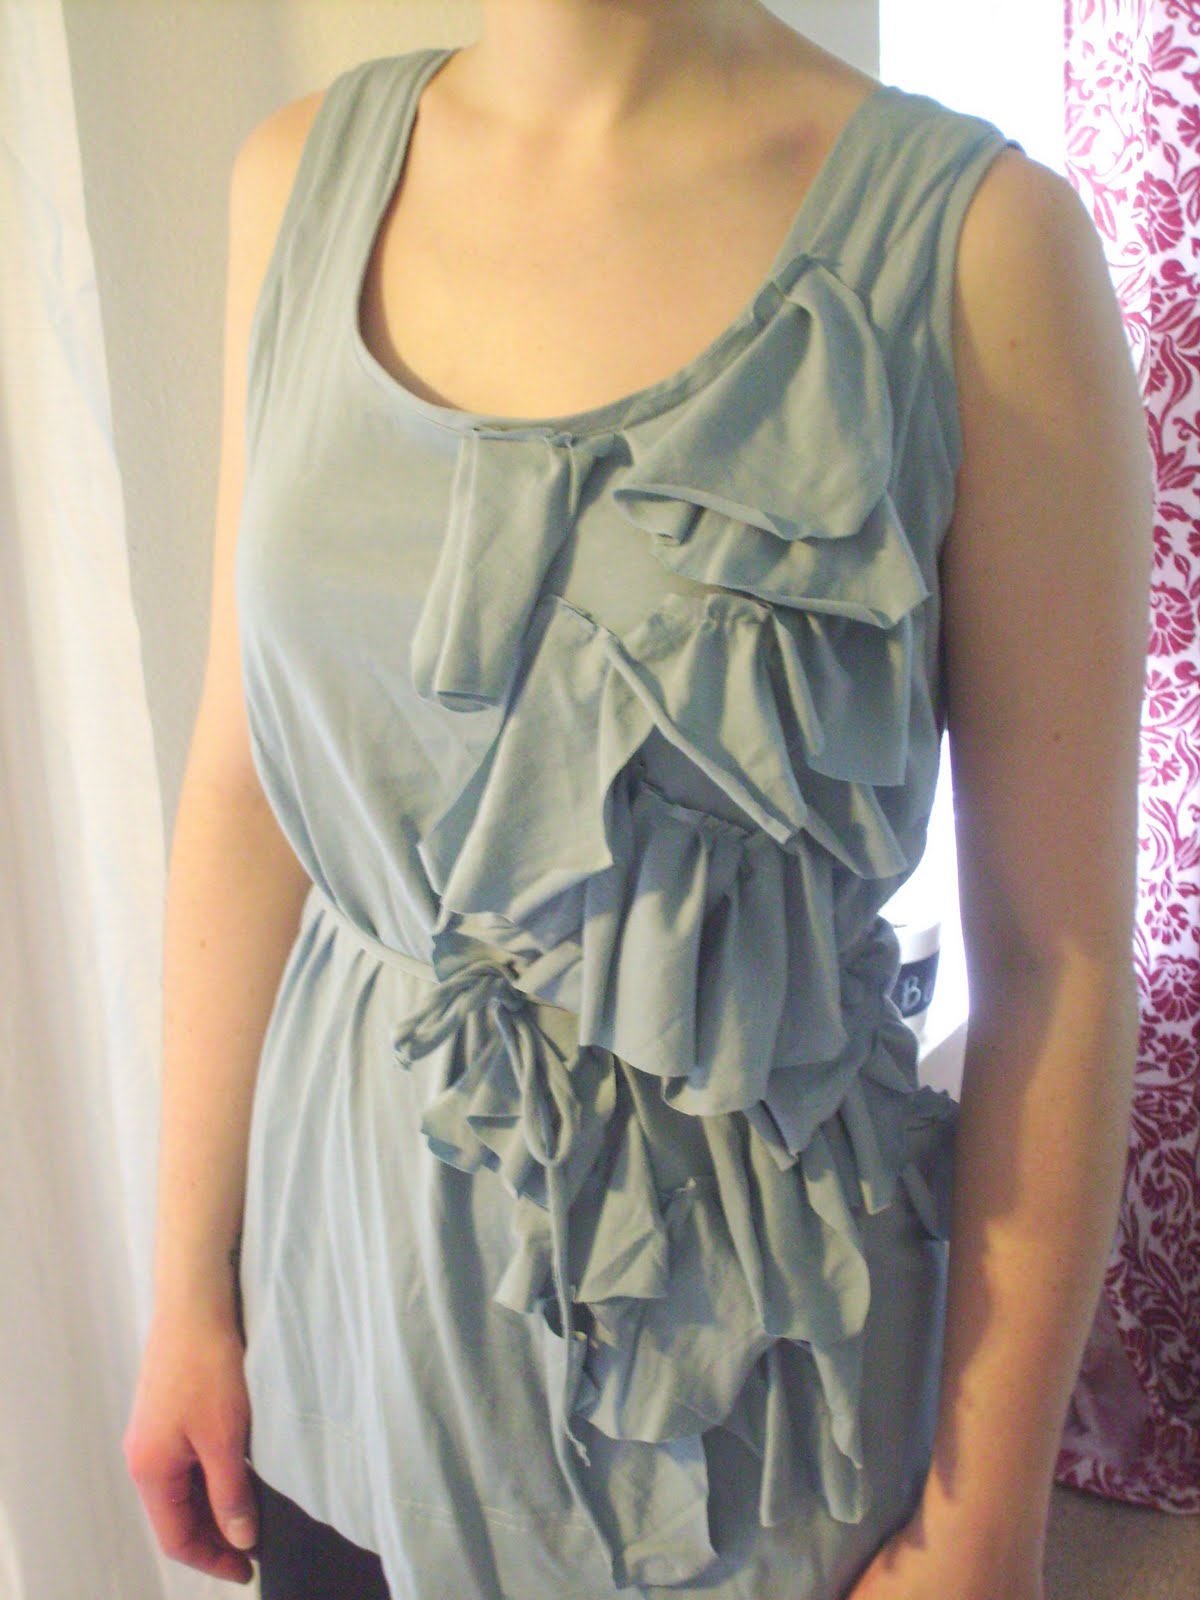
I'm seeing wide strips of bias-cut lightweight knit with little tiny pleats that make them look like ruffles, cascading down the left front of the tank. It's a loose-fitting tank in an equally light knit; I have seen plain tanks like this at Old Navy, etc. but I had a ton of supersoft cotton knit in a soft color that I thought would be perfect. It would probably be easiest to make this tank in a color you know you could match at the fabric store, like black or white--buy a tank for cheap and add your own ruffles--but this tutorial is for the whole shebang, as if you were making it from scratch like I did.
***If you're using a store-bought tank, scroll down to the asterisks for the steps you'll need to follow!***
So here's the tutorial!
- Use a tank of a similar shape to trace your pattern. I'm using a close-fitting one, so I want to make it much bigger through the body. Leave a 1/2-5/8" seam allowance, whichever you prefer, on top of the fit changes.

- Because of the fickleness of knits, I recommend you cut half of the tank, then fold over the cut part to use as your pattern.


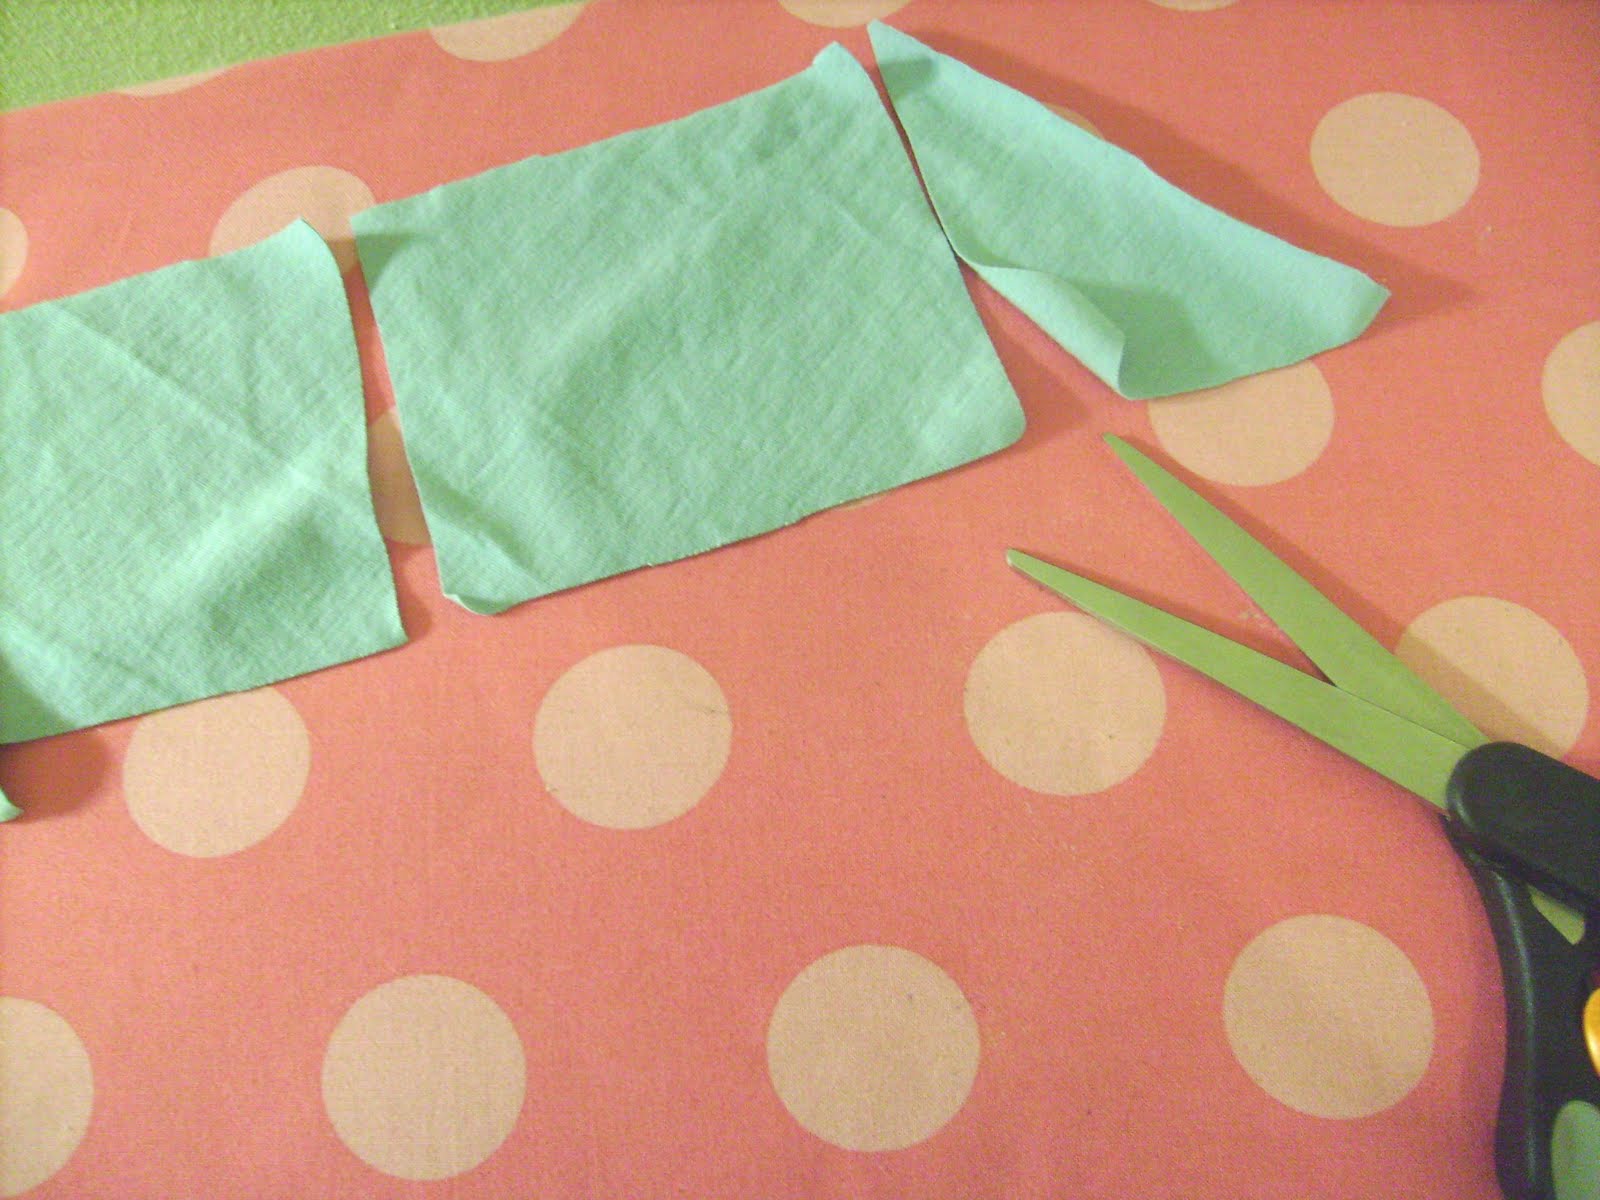
- Cut several wide bias strips (about the width of your hand) and several thinner bias strips, about 1.5" wide.


- Now cut your belt. This is the easiest part--just cut a 1-2" piece on the straight grain and PULL on it--it'll curl up just right!


- Now assemble the tank. You know the drill; sew right sides together along the side seams and shoulder seams. If you have a serger, great, you can serge your seam allowances, but I don't so I did a straight seam and then a zig zag along the raw edges to keep the extra from curling up. Make sure to press your seams to one side.

- There are a few different options for finishing the neck and armhole edges, but I'm going to copy the J.Crew version as closely as I feel comfortable and give it a self-fabric edge (theirs is on the straight grain, I think, but I don't want to deal with all the curling so I'm using bias). If you're doing it the way I did it, sew all your thin bias strips together, right sides together, and press those seams open.
- Press your looooong, thin bias strip in half so the right side is the outside.

- Sew your bias to your tank neck and armholes right sides together. Give a teeeeeny bit extra tension on the bias so it pulls upward and inward.

- Press the curves the right way, then you can zig zag or serge these edges when you're done, too, then press flat again.


- Hem the tank to the length you want. I gave mine a big hem and I like to go along the hem twice to give it the store-bought look of the industrial machines.

***Now for the fun part! The ruffles! Start here if you're using a store-bought tank!***
- Cut your bias strips into sort of rectangles. Do the same pull thing so that the edges (only two edges) curl toward the right side of the fabric. Play around with it!

- Now pin your ruffles on. I used my close-up shot of the lavender J.Crew tank as a guide and just sort of went for it! I looked at the placement, spacing, and ruffled-ness of the example and tried to copy, but after the first few random "rows" it wasn't necessary, and I just put them where they looked good. Do note that these aren't really ruffles--no need to tighten your tension and run a long straight stitch through, then gather. Just use pins to make little tiny tucks and sew down. (This is one of those times where you might think about using iron-on interfacing on the inside to help the tank support itself, and I recommend it if your tank has any spandex or lycra in it, but mine is all cotton and is holding its shape nicely).

- Notice that some of the ruffles on the J.Crew one have about a 1/4" seam, whereas some are at more like 3/8". Play around with it and get the look you want.
- Belt it when you wear it. You can choose to sew the belt down at the sides, but I didn't. Woo hoo!

Whee, this was a fun project!